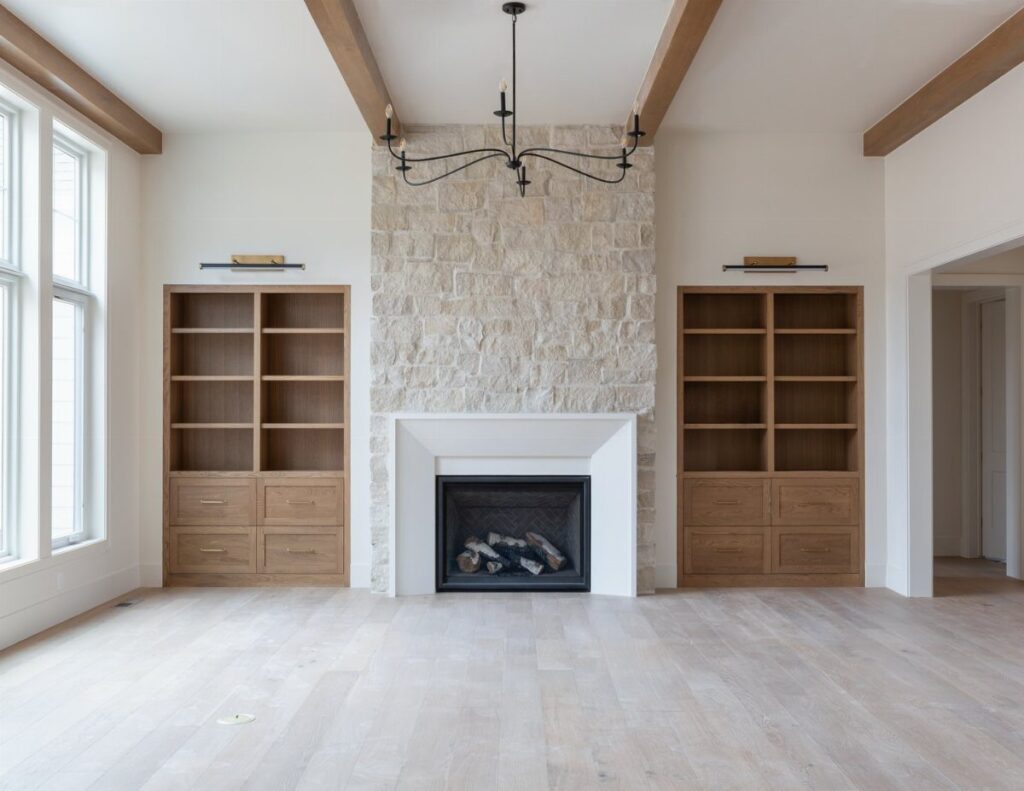
Built-ins in this list run from floating shelves to a wet bar that needs a plumber, so the real divider is how much of the work your wall and your skills can take on.
If the room has no plumbing or wiring nearby, stock unfinished boxes from Lowe’s, Home Depot or Menards, set level on a shimmed base and screwed into studs, will carry most of the ideas here.
Once a sink or LED strips enter the plan, expect custom work built one section at a time.
1. Crown Molding at the Top of Built-ins
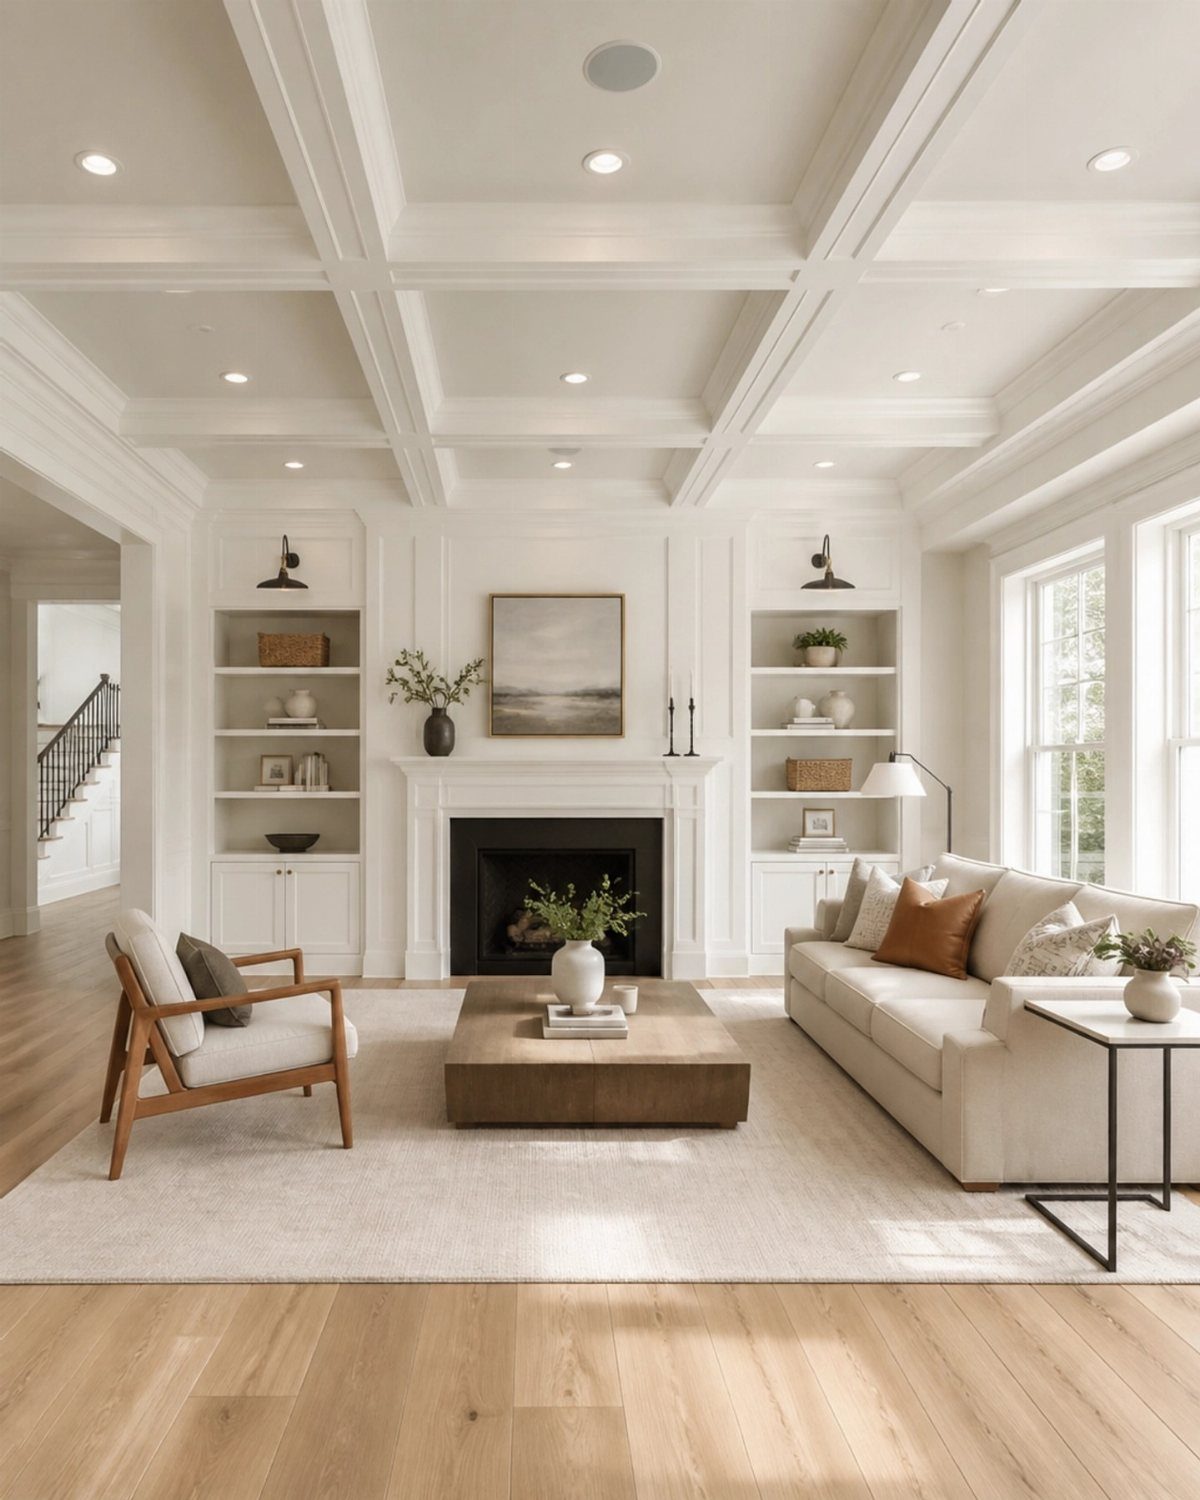
Crown molding is what makes white built-ins read as part of the room instead of furniture parked against a wall.
Running it along the top edge closes the gap between the cabinets and the ceiling and ties the units into the room’s existing trim.
For a budget build, I would paint the molding the same white as the shelves so it blends into one piece. A contrasting color draws the eye up, which only helps if the ceiling is worth looking at.
Add it last, after the shelving is in and caulked.
2. Custom Shelving
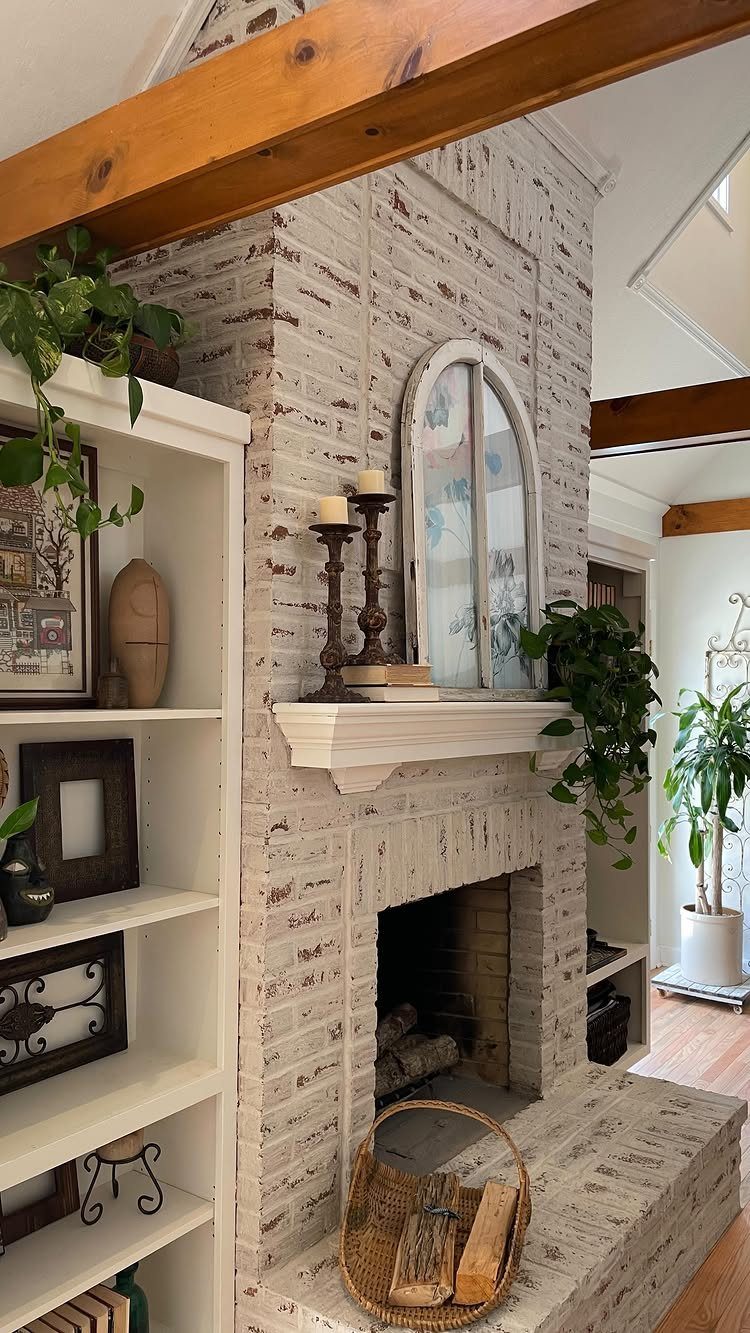
An 18 foot living room is a lot of wall to fill, and the maker of this one says she touched every inch of it. That is the real cost of custom shelving: hours, not just lumber.
Measure the alcove beside a fireplace, then size the shelves to that space instead of to stock bookcases. Fitting around a brick surround and wood beams is where custom beats store-bought.
I would plan a full weekend per section, and cut shelf depth to suit what you will actually display.
3. Painted Cabinets
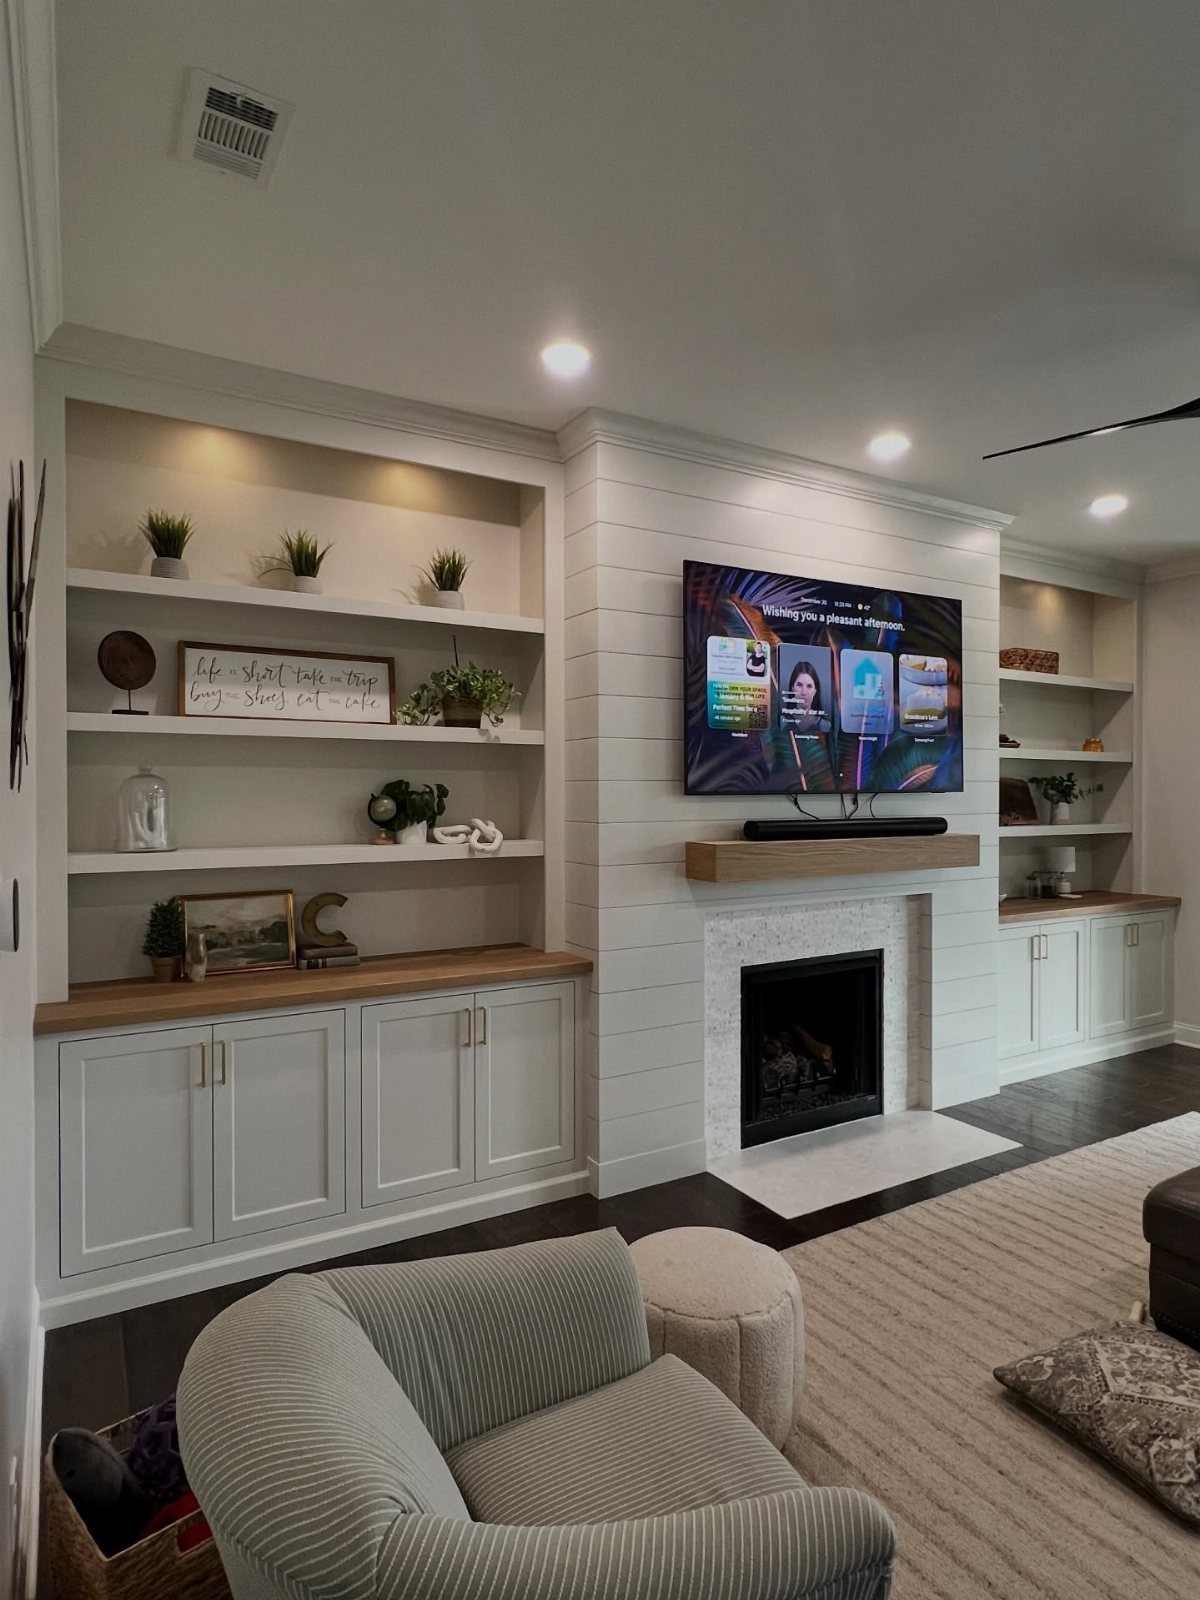
Paint is the cheapest way to change built-ins, and white keeps them calm around a fireplace and TV. A dark TV against pale cabinets also stands out less than it would against bare wood.
Sand lightly, prime, and use a paint made for cabinets so the finish resists wear. I would take the doors off and paint them flat; brushing them while hanging leaves drips.
Skip the rush on the second coat. Waiting between coats is what separates a smooth finish from a tacky one.
4. Built-in Entertainment Center
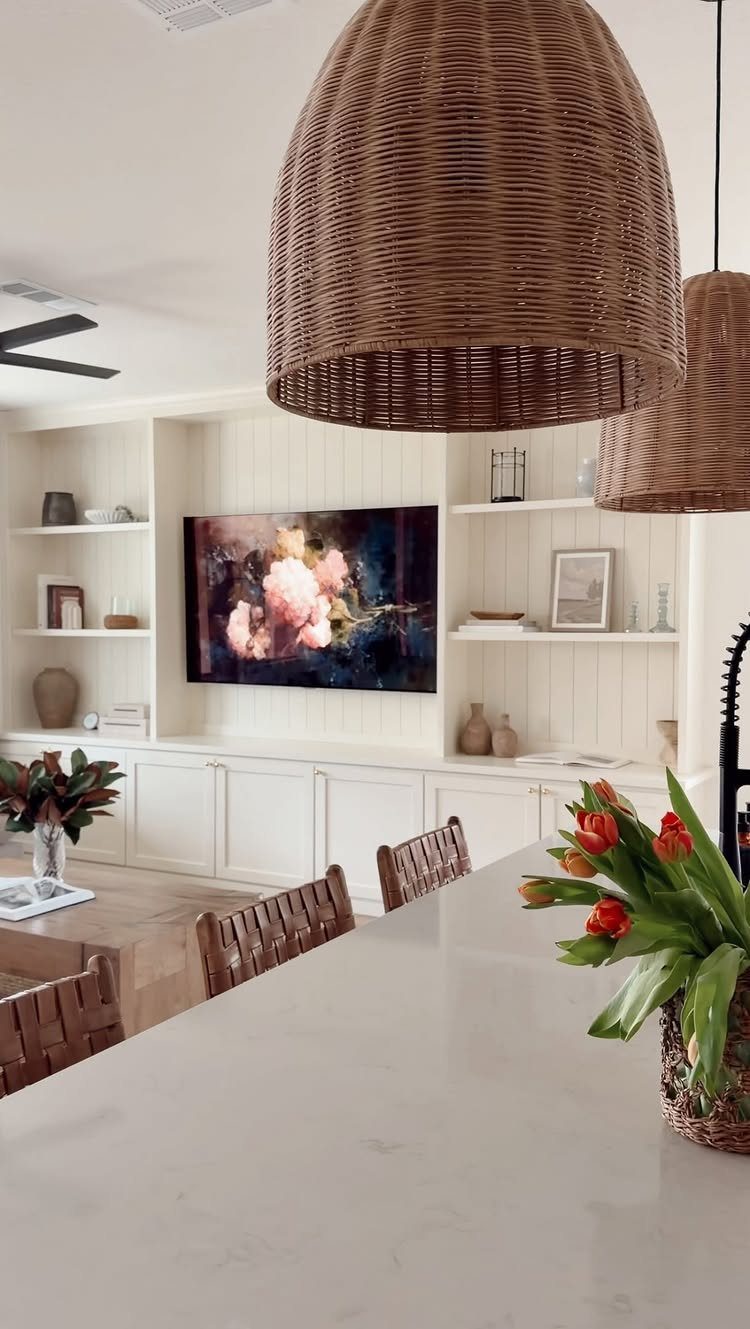
Lower cabinets with open shelving above give a TV wall both hidden storage and a place to display things.
Closed doors below hold the clutter of media: cables, remotes, game controllers, while the open shelves keep the wall from feeling heavy.
Decide the TV size and placement before anything else, then build around it. Leave room behind the set for cords to pass through.
I like pairing a built-in this plain with a bold light fixture, so the wall has one focal point beyond the screen.
5. Floating Shelves
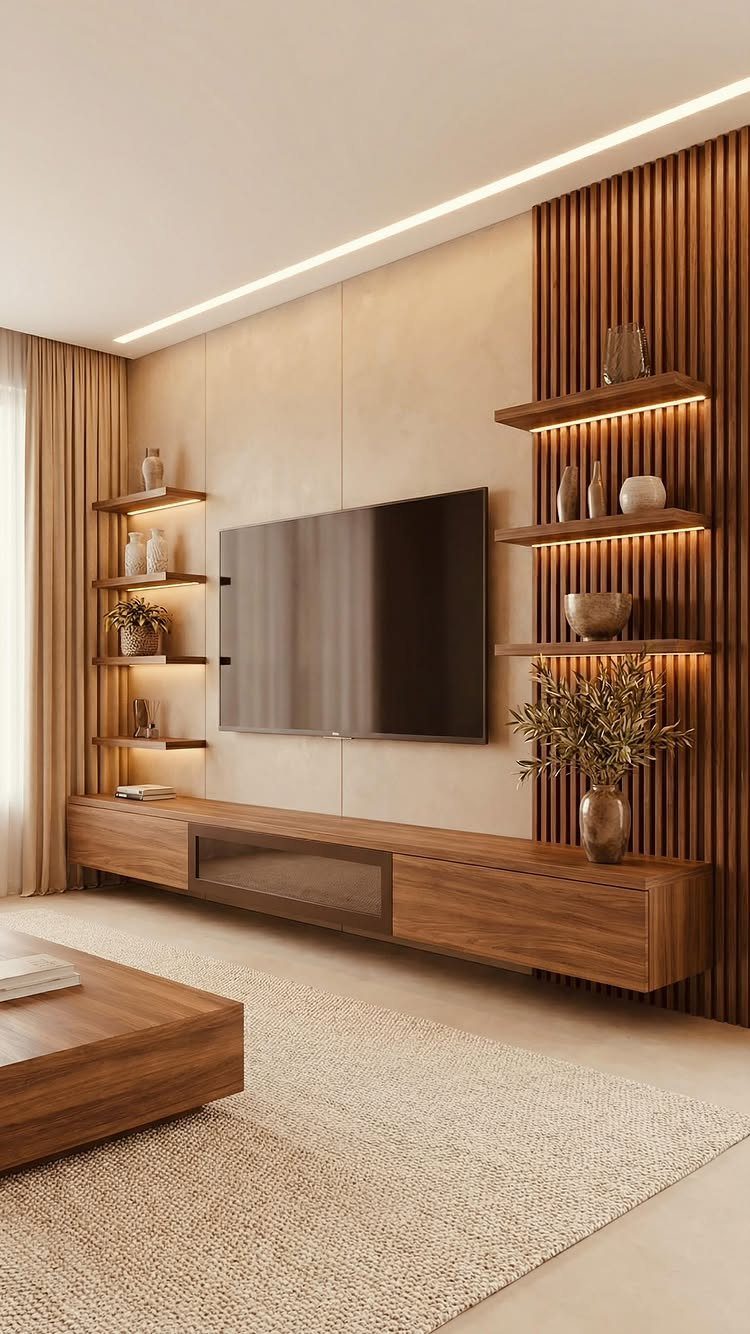
Floating shelves skip the cabinet box, so the wall stays visible behind them and the room feels lighter. Flanking a wall-mounted TV, they frame the screen and add storage without the bulk of floor-to-ceiling cabinets.
The maker of this set says no 2 projects are the same, and that holds for DIY: shelf length and spacing should follow your wall and your TV.
Integrated lighting is a nice upgrade, but I would plan the wiring before the shelves go up, not after.
6. Closed Cabinets at the Bottom
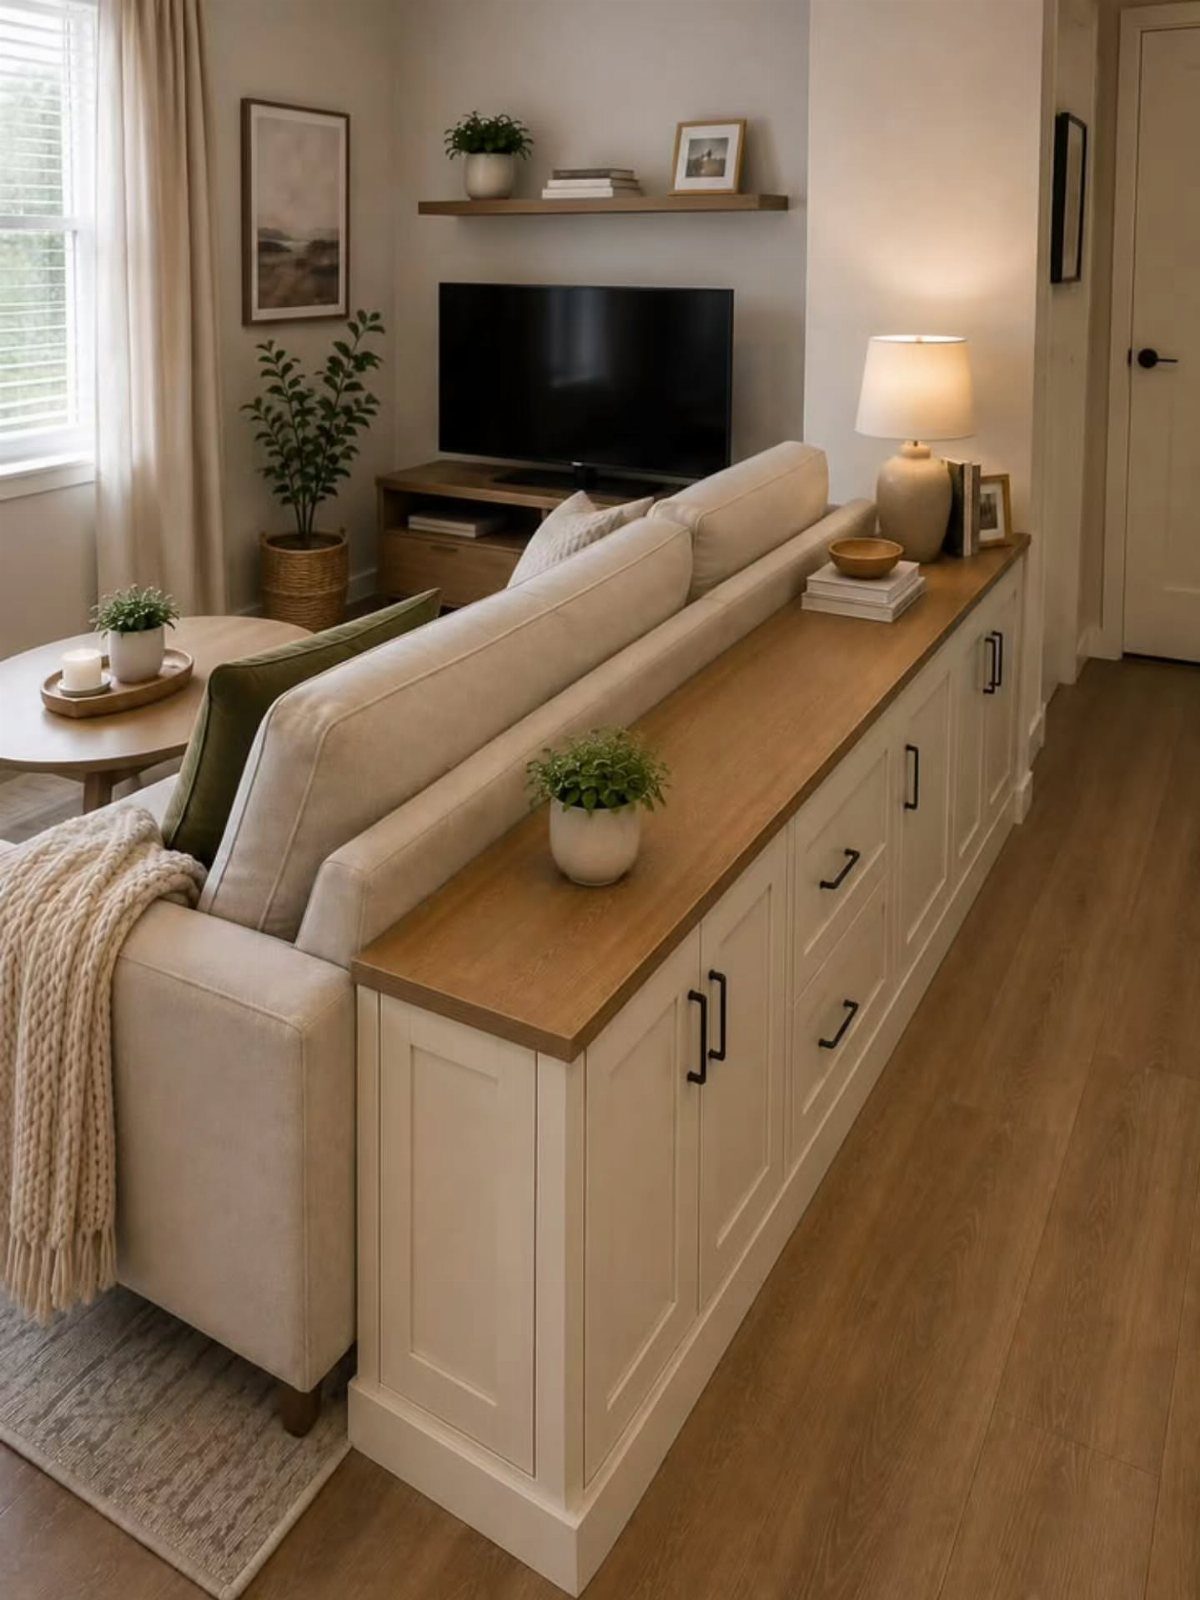
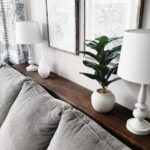
A long run of closed cabinets with a wood top can sit behind a sofa and double as a console.
The doors hide whatever you would rather not see, and the top gives you a surface for lamps or a tray.
I prefer a wood top over white because it warms up a pale room and hides daily wear better than a painted surface.
Check the depth first. A sofa pushed against a cabinet should still leave room to walk around it.
7. Shallow Cabinets for Smaller Living Areas
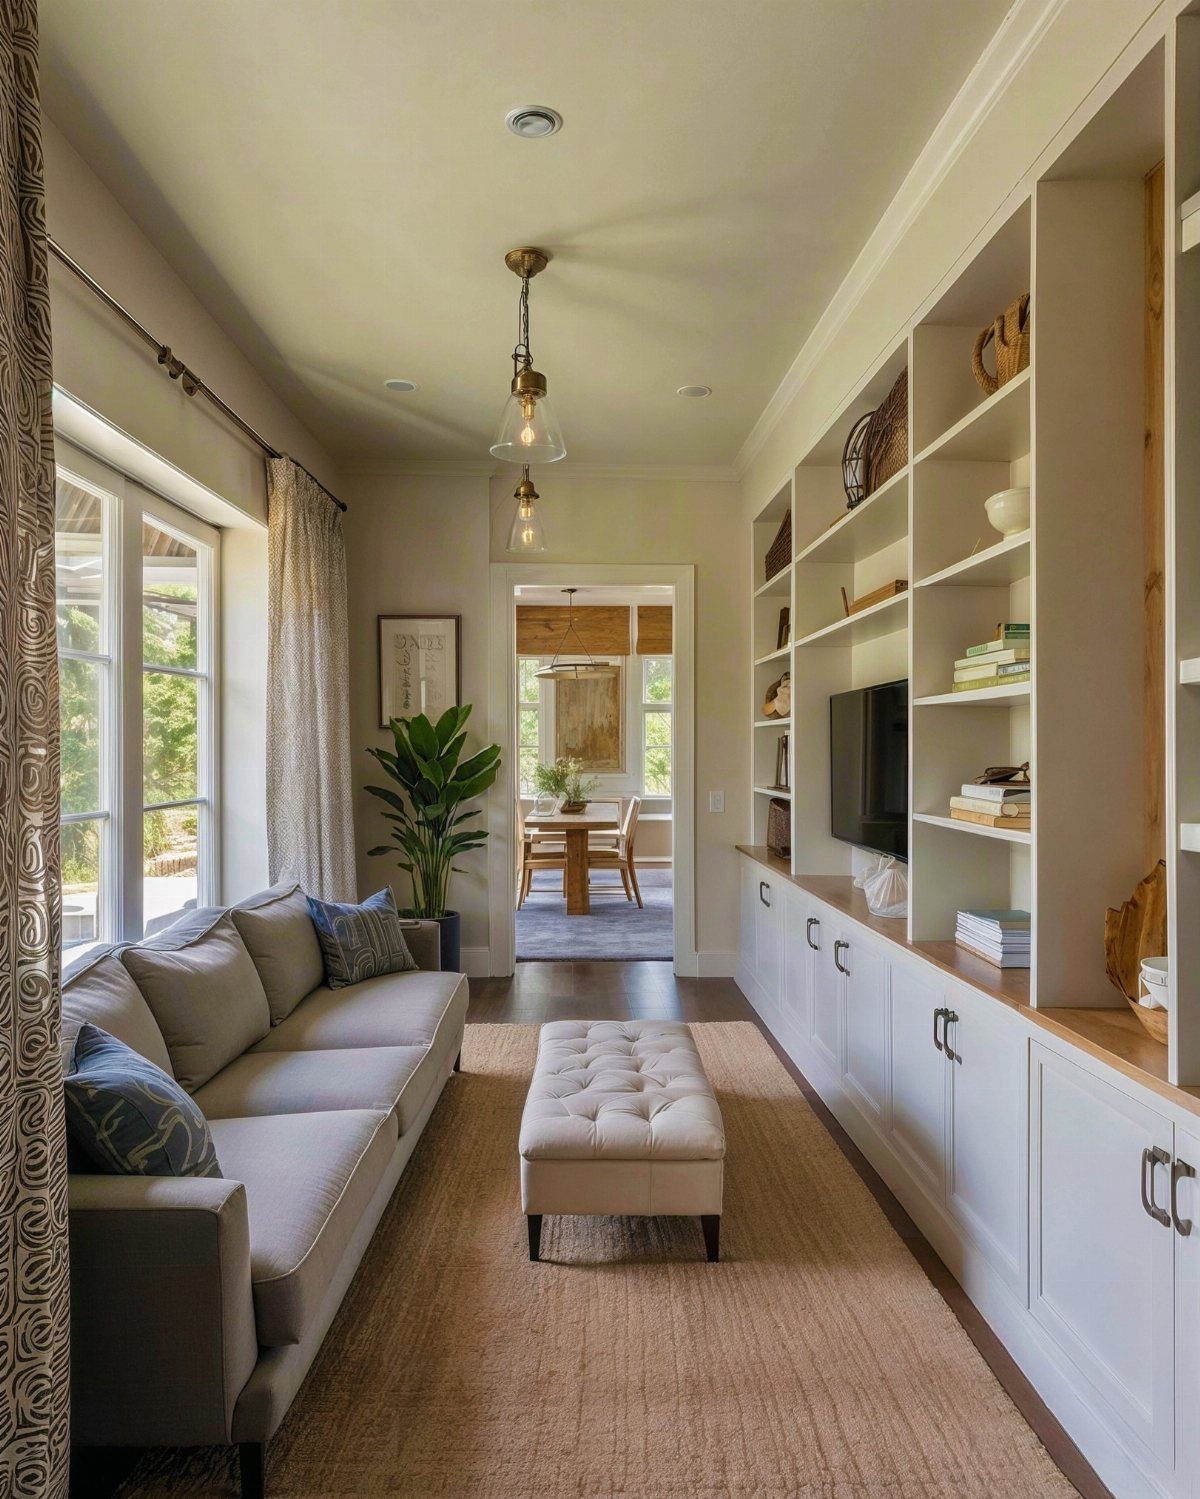
Built-ins in a narrow living room should be shallow, because every inch of depth comes out of the floor space you walk through. Cabinets and shelving that stay close to the wall give you storage without pinching the room.
Measure the width of the walkway first, then work backward to the deepest unit that still leaves a comfortable path. Painting the units white, as in this room, keeps them from looking heavy beside a grey sofa.
Shallow shelves hold books and baskets well, but not bulky items.
8. Custom Built-ins
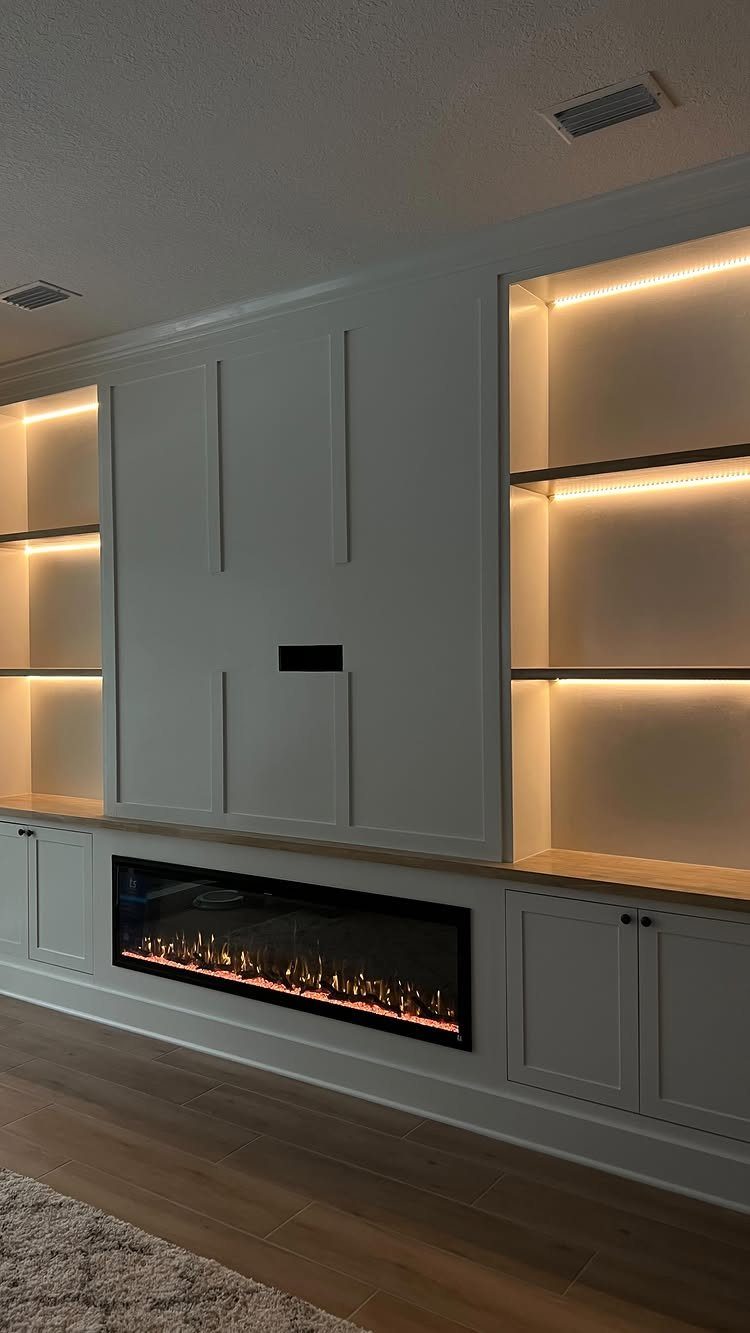
A custom wall unit lets you fold a fireplace, lighting and storage into a single piece instead of buying 3 separate ones.
Warm LED strips along the shelves make the display area glow in the evening, and I would run the wiring before closing anything up. Painting everything white keeps a large unit calm.
Custom costs more in time and money than stock cabinets, so build in sections and finish one before starting the next.
9. Wood Slat Accent Wall Niches
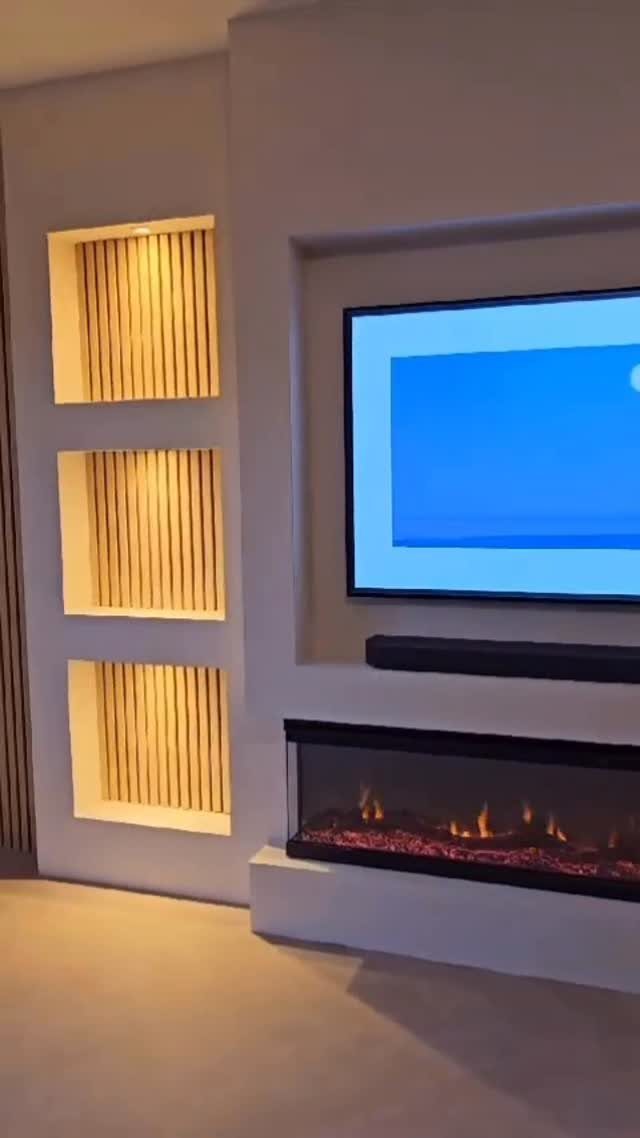
Vertical wood slats turn a plain recess into a feature, and light-colored wood keeps the wall warm without darkening the room. 3 tall niches beside a TV and fireplace give you display space with no shelves to dust.
Line the back of each niche with slats, then add a warm light source inside so the wood glows. Plan the wiring and the TV recess before you attach any slats.
For a budget build, I would slat just one niche first and see how the lighting reads.
10. Built-in Living Room Wet Bar
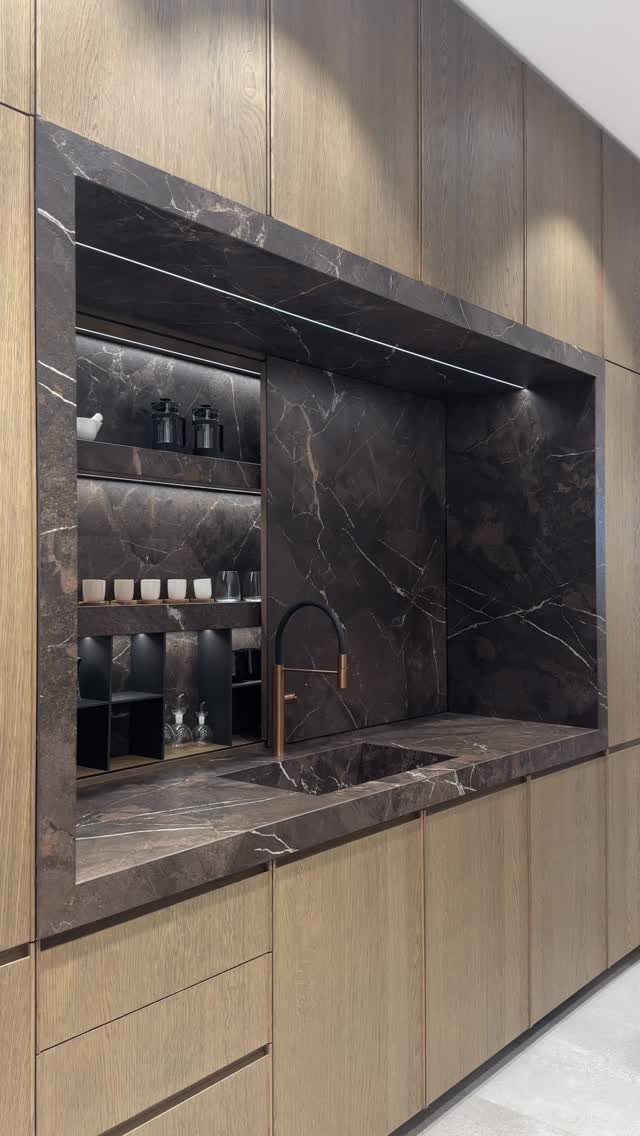
A wet bar tucked into a built-in niche puts a sink, a counter and glassware shelves in one compact spot.
Dark marble on the counter and backsplash against light wood cabinetry gives the corner contrast, and a stone backsplash wipes clean after spills.
Plumbing is the limit here: a sink needs water and a drain, so unless the niche sits near existing lines, hire a plumber. That pushes this well past a weekend DIY.
Marble costs more than laminate, so a small niche is the right place to splurge.
Cost-effective Solutions
Stock cabinets are the biggest budget lever in a built-in. Prefab boxes arrive with the joinery already done, which cuts both labor cost and hours on site, and leaves you free to focus on the trim and finish work.
Lowe’s, Home Depot and Menards all stock unfinished cabinets ready to pick up.
The three stores carry nearly the same designs, but door profiles and cabinet dimensions sometimes vary just enough to affect your layout, so compare all three if you want specific sizes or styles.
Use the stock boxes for the base and build the upper part around them.
Installation Tips
Base cabinets go in faster and with less hassle than wall cabinets. You need a drill with enough torque to drive through hardwood, a bag of shims, cabinet screws that will hold, and the patience to get each box level.
Take the doors off before you start. It makes the boxes lighter to move, and you will be painting them anyway.
Join neighboring cabinets by drilling a pilot hole through the frame and driving in a cabinet screw. Clamp the 2 boxes together as you drive it so the faces stay flush.
A level base matters more than anything else.
If the base run is not level and plumb, the cabinets will not mate cleanly and gaps will open between them. Check it with a level before the first box goes on, and shim until it reads true.
After the cabinets are joined to each other, fasten them to the wall by driving screws through the back rail into studs.
Material Considerations
Unfinished wood cabinets are the practical choice for a built-in you plan to customize. They take primer and paint well, so you pick the color and the finish instead of accepting whatever a factory applied.
Match the material to how the piece will be used. Cabinets that take daily wear, like those near a seating area, need a hardwearing paint made for cabinets.
Buy all the cabinets for one wall at the same time, so the wood and construction match from box to box.
Frequently Asked Questions
How much do living room built-ins cost?
It depends on the materials and the design, and I can’t give a single honest number.
Stock unfinished cabinets from the big-box stores run less than custom work because you skip most of the labor. Custom work costs more in both time and money, and a marble wet bar niche pushes the total higher still.
What are some good ideas for built-ins in a living room?
Stock cabinets with trim and paint give a custom look for the least money.
Cabinets below with open shelves above give you closed storage for cables and remotes and display space higher up. In a narrow room, go shallow or use floating shelves so the built-in doesn’t eat the walkway.
Is it cheaper to buy cabinets or have them built?
Stock cabinets cost less than custom built-ins in nearly every case.
Prefab boxes come with the joinery done, which saves labor and hours. Building your own can still cost more than a local carpenter’s quote if you buy raw hardwood and high-end tools.